Check the waiting list
Open the waiting list by clicking on the clock at the top left of the calendar.
Here you can see a list of all patients already on the waiting list.
Add patient to the waiting list
To add a new patient to the waiting list, click on the [+] sign at the top right corner.
Then fill in the missing data:
- Select the patient you wish to place on the waiting list
- Choose the appointment type for which the patient is waiting
- Choose a preferred location if necessary
- Choose a preferred practitioner, if any
- Fill in any additional notes
- When finished, click [Add to waiting list].
The patient is now added to the waiting list.
Via the [ ] button you can quickly view the patient data.
Changing the linked patient is done via the [ ] button.
Removing the patient from the waiting list is done via the [ ] button.
Linking patient from waiting list to appointment.
When you add a new appointment, depending on the fields that match the items placed on the waiting list (treatment type, location, etc.), the patients who are eligible for this appointment will appear at the top. Click on [From Waiting List] to select a patient from the waiting list.
Then, select the desired patient via the [Select] button.
The patient is now added to the appointment and removed from the waiting list. If you check [Keep in waiting list], the patient will remain on the waiting list.
Add patient to waiting list via calendar.
When you add an appointment for a patient who prefers an appointment in a shorter time span, put the patient on the waiting list via the [Add to waiting list] button.
Now the patient is on the waiting list. The [Appointment] column displays the date of the patient's current appointment, where you've added the patient from to the waiting list.
When giving the patient a new appointment using the waiting list, the appointment will be rescheduled, and the patient is removed from the waiting list.
When making an appointment, click [From waiting list].
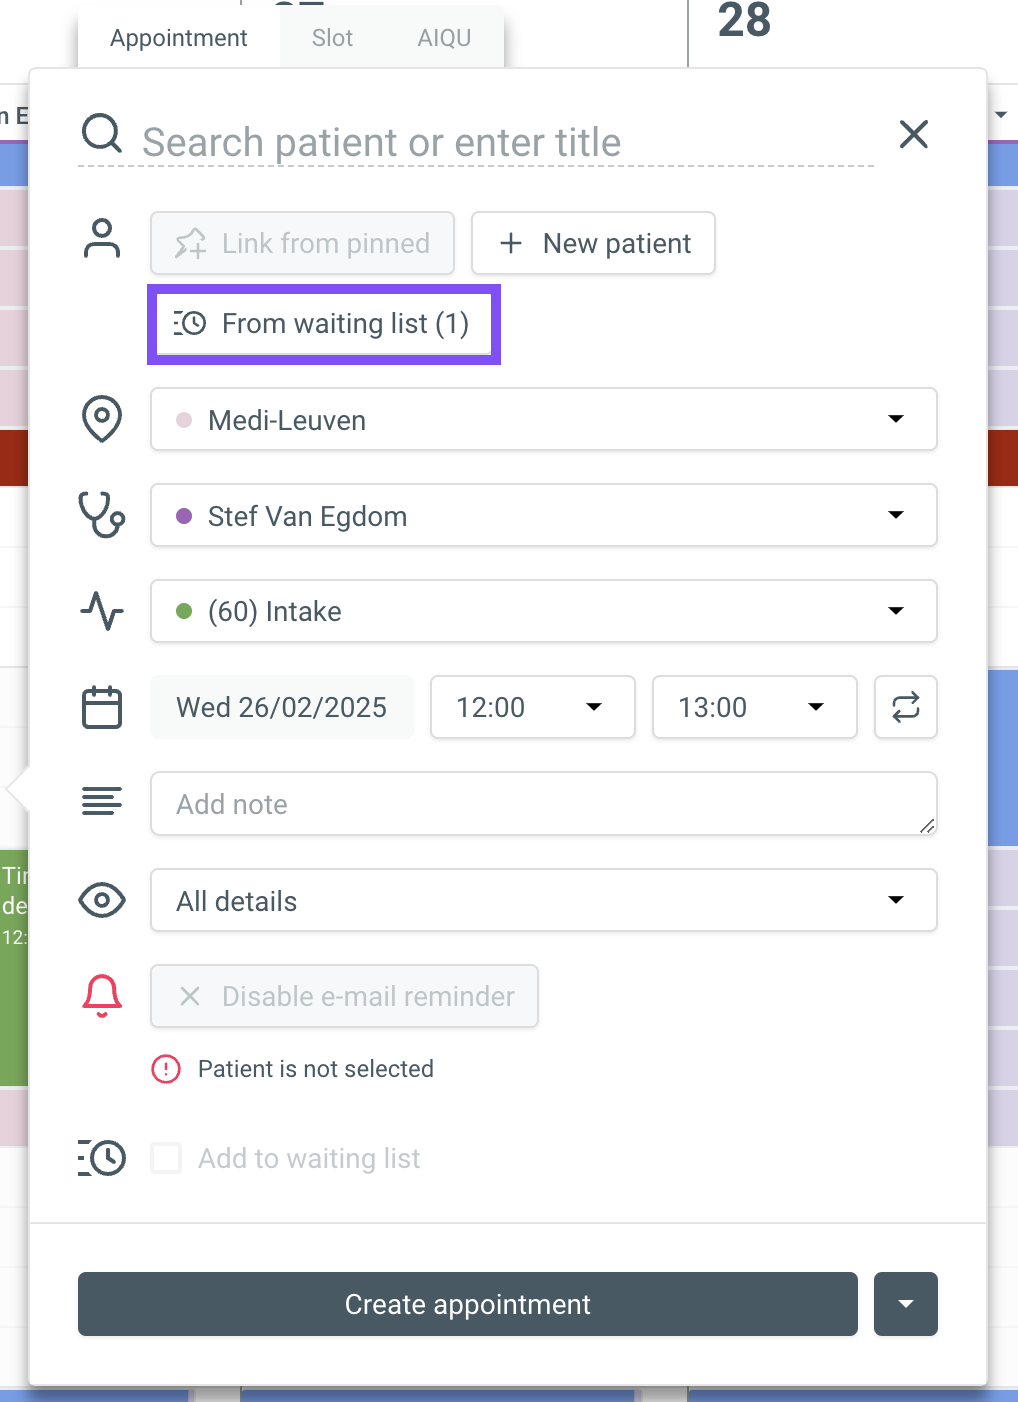
Select the patient you want to make an appointment for.
The appointment is rescheduled and disappears from the waiting list.
Placing patient on waiting list via deleted appointment
When you delete an appointment, a panel will appear at the bottom right that allows you to add the patient to the waiting list if desired by clicking [Add patient to waiting list].
Change any of the criteria as appointment type/location/practitioner and click [Add patient to waiting list] to add the patient to the waiting list.
If you click on [Fill the gap], the appointment balloon will appear, immediately enabling you to fill the empty space.
Related Articles
Agenda: List view
List view With list view, you can see at a glance which information is important for your daily workflow. For example, you can immediately see which patients are scheduled for today, which online bookings still need to be confirmed and you can easily ...Gap Search
Gap Search using the agenda This function is used to display the first available free slots for appointments from the waiting list. Available times are calculated based on the work schedule and slots. See also: - Check the waiting list - Set a work ...Run MyCareNet check
Automatic execution of the MyCareNet check MyCareNet is only accessible to our Belgian users. The MyCareNet check is performed using the patient's INSZ number. The use of the MyCareNet check requires a link with eHealth. Click on the profile picture ...A3. Your data during the transition: what's included and what's not?
During the transition to Crossuite QI, we automatically include a large part of your practice data, such as patient information, documents, appointments, and financial data. However, some data is not migrated, such as certain templates, emails, or ...Send invoices in bulk
The number of emails you can send at once depends on your email provider. We recommend never sending more than 30 emails (invoices) simultaneously unless you are sure your email provider allows it. Check with your email provider for SMTP limits. ...