Create/Edit Report/Document Template
To create a new template, go to the settings and click on [Documents] and then on [Document template].
Clicking the  button allows you to create a new template.
Now the screen to configure your template will open.
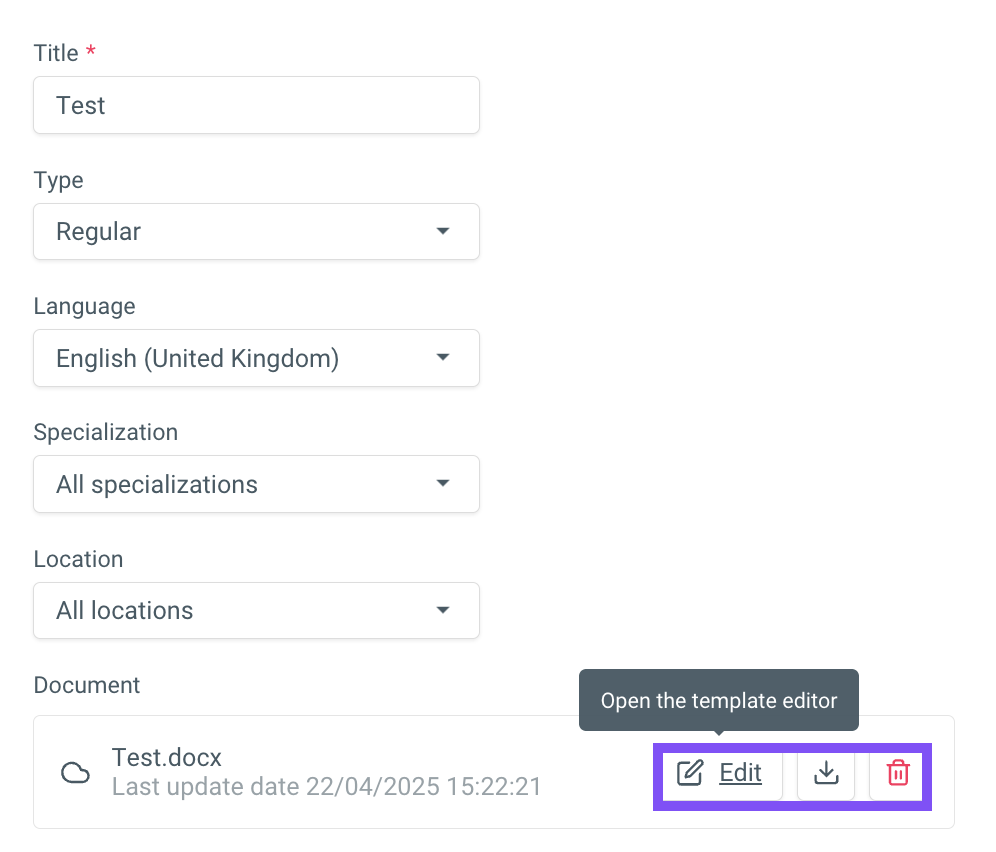
Here you set the following settings:
- Title
- Type: Here you choose between different types of templates: Report, Request, Draft, etc.
- Language
- Specialization: Here you choose for which practitioners with which specialization/discipline it should be available.
- Location
After setting this, click on [+ Create cloud document] to start creating your own report template.
Or, if it has already been created in a Word version, upload it via the [Choose a file (.docx)] option.
To then save the template in your documents library, click on [Create template].

It is best to create a new template based on an existing one.
Create your own document
After clicking on [+ Create cloud document], you will enter the editor.
After this, you will get a blank document. On the left side, you have options to add auto fields (fields that are automatically filled in per patient).
You use these to build your own report/document.
Edits are saved automatically; after the edits, you can close this template.
Then click on [Create template] to save the report/document.
Edit document
To edit an existing template, go to the settings and click on [Documents] and then on [Document template].
Here, all created templates are stored, and you can modify them by clicking the  button next to the template.
Now you will enter the screen where you can change the template settings. To modify the template itself, click [Edit] to edit it in Crossuite in the editor, or click the button to download it and modify it yourself in Word. After an offline modification in Word, you must delete the existing template via the
  button and upload the modified version again.